
Using Dashboards
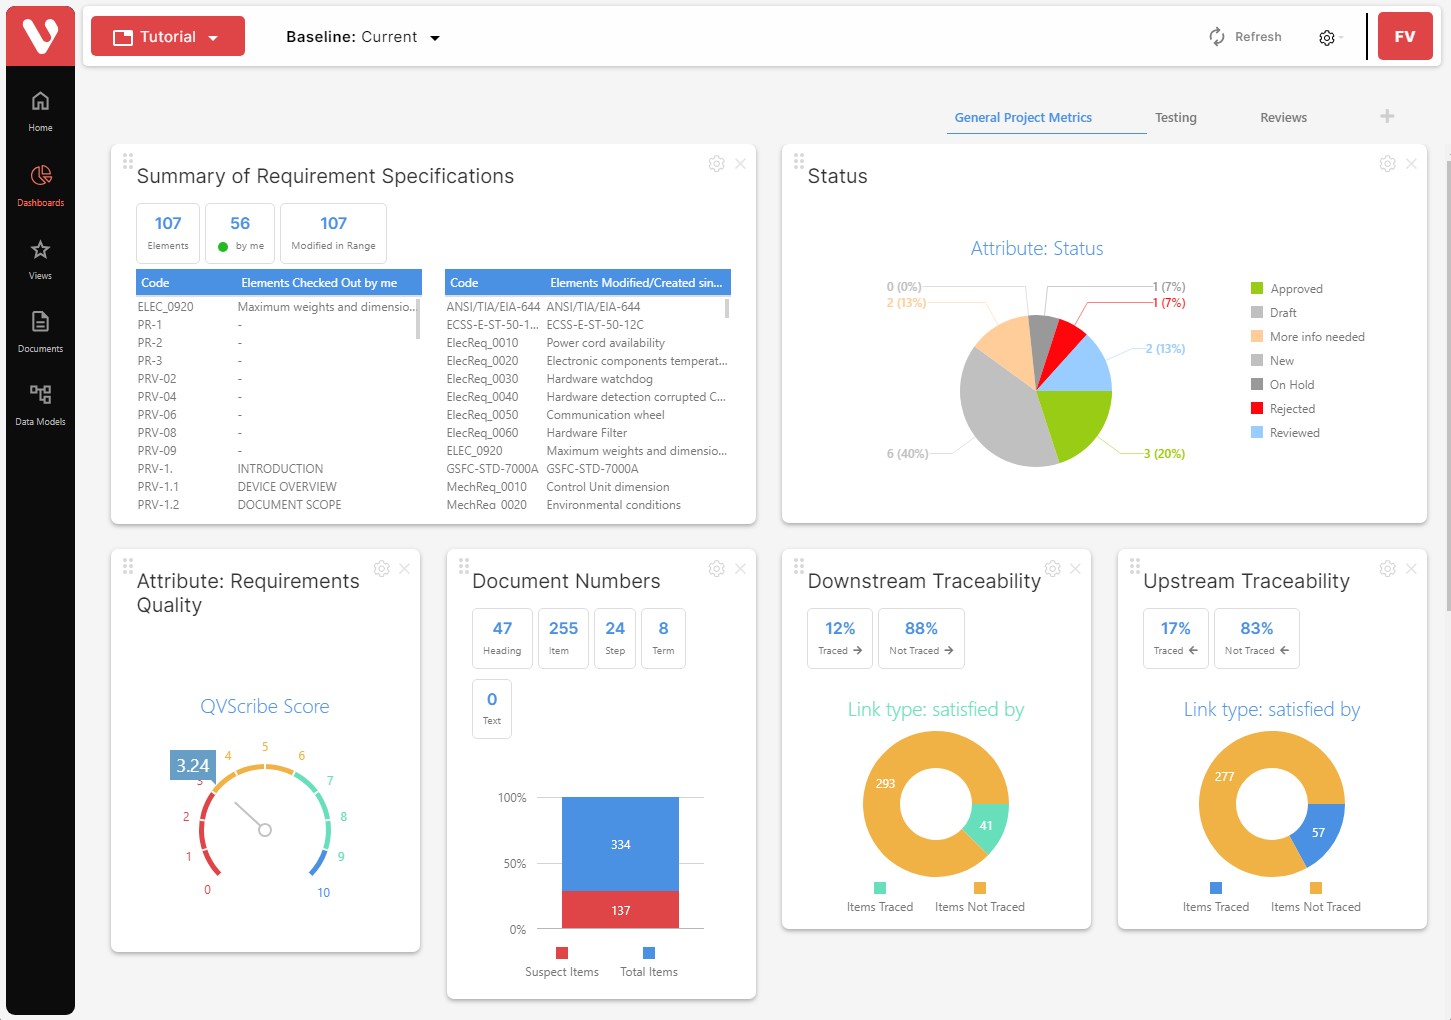
Dashboards in Visure are meant to summarize important project information and convey it to the users in a quick and understandable way that can help them make the most appropriate decisions. Dashboards are an important part of the project and can be tailored by project managers to the needs of each project and user group.
Dashboards can be accessed by the users of the project by clicking on the Dashboards icon in the Element Types panel at the left-hand side of the application

The user will then be taken to the dashboards page:
Managing dashboards
Dashboards can be composed of multiple dashboard sections, each one containing different information. Project Managers may decide to include different types of information in each dashboard for different types of users or process e.g. Requirements, Tests, Risks, Reviews, Releases, etc.
These dashboards can be found at the top-right corner of the dashboards, and clicking on the name will take the user to a different dashboard:

Creating new dashboards
Project managers will be able to create new dashboards by clicking on the plus (+) icon, entering a name, and clicking on the Add button.
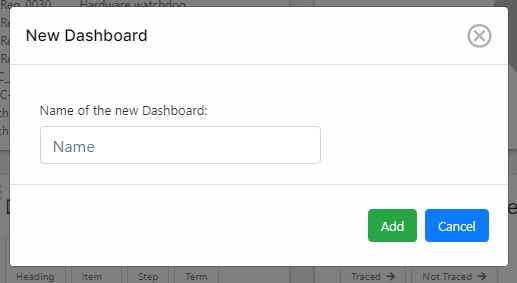
This will automatically create a blank dashboard.
Editing dashboards
Project Managers can change the name of the dashboard by clicking on the edit button (
Deleting dashboards
Project Managers can delete a dashboard by clicking on the delete button (X) at the right of the dashboard name when hovering on top of it.
Rearranging dashboards
Project Managers can rearrange the order of the dashboards by simply drag and dropping the names and changing the order in which they appear.